Gnosis no-code App
The Gnosis Application Platform takes a Model-Driven Design approach to building Apps. In Gnosis, you model your Application Business Entities and Logic using the Gnosis no-code App.
Users can immediately begin using the App with the same App without coding.
The Gnosis no-code App dynamically adapts to Application changes, so as you change the App, the User Interface automatically adapts.
Gnosis automatically generates Views, allowing users to create, read, update, search, and promote items driven by the Models.
The Gnosis App can be configured with custom Application Logic and Views with Gnosis low-code Scripting.
The Gnosis no-code App provides the following configurable features:
- User Login
- Self-registration User Accounts
- External Authentication
- User and Teams-based Access Control
- Anonymous User
- The ability for Users to Explore, Create, Read, Update, Delete, and Promote Items
- Render Custom Views
- Perform Custom Actions
User Login
Users can log in to the Gnosis App using the built-in Login Page:
/Account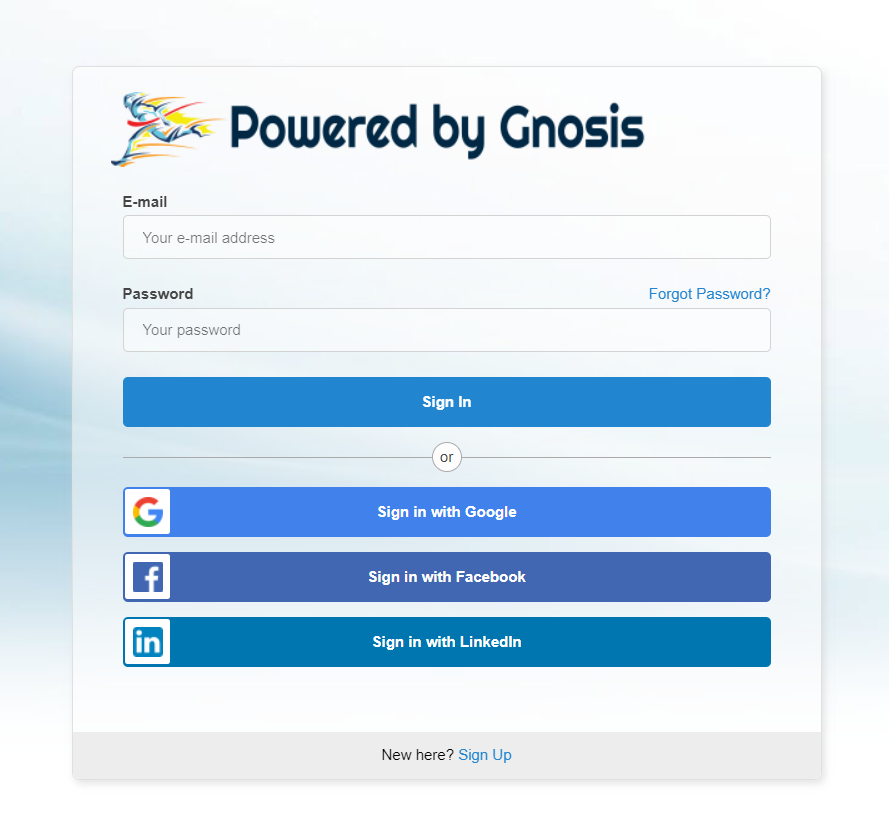
Users can log in using their email and password; alternatively, if configured, they can log in with their external social media accounts.
Users can also register from the Login Page if external authentication and Self-Registration are configured.
Logo & Background
You can replace the default logo and background by uploading images in the Gnosis Files App:
/#dashbaord:filesReplace the logo by uploading an image to the /resources/logo.png file. The image can be in any format (the PNG format is required.)
Replace the background by uploading an image to the /resources/background.png file. The image can be in any format (the PNG format is required.)
External Authentication
Configure external authentication to allow users to log in, connect, and self-register using their social media user account.
Enable Providers
Open the Gnosis Configuration App:
/#dashboard:configSet the /OAuth/EnabledProviders configuration setting as a comma-delimited list of external authentication providers.
/OAuth/EnabledProviders = Google, LinkedIn, FacebookEnable Google Authentication
Set the /OAuth/Google/ClientId configuration setting to the Google application Client ID.
/OAuth/Google/ClientId = xxxxxxxxxSet the /OAuth/Google/ClientSecret configuration setting to the Google application Client Secret.
/OAuth/Google/ClientSecret = xxxxxxxxxConfigure Google App
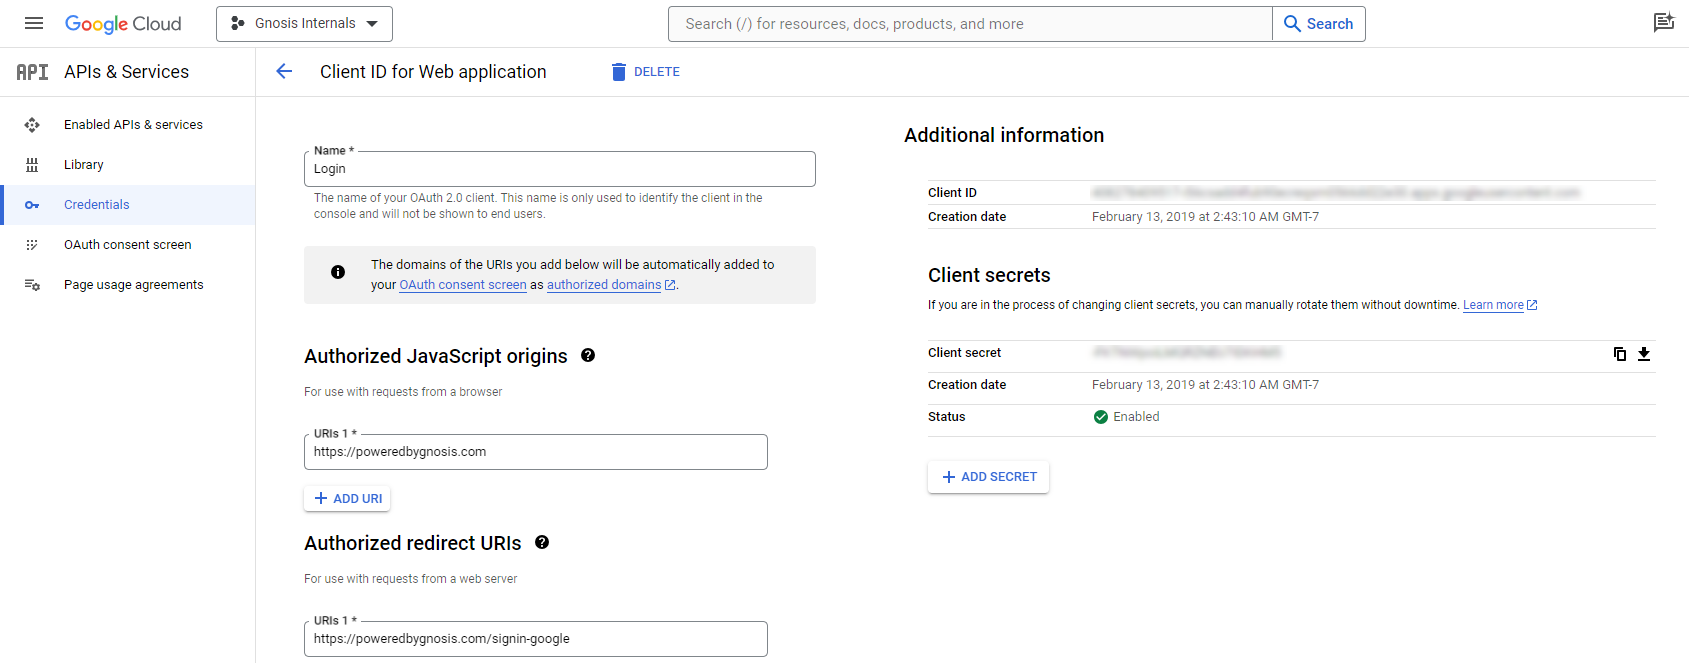
Go to https://console.cloud.google.com/ to create a Google App.
Create a project and set up OAuth 2.0 credentials.
Configure the Authorized redirect URI to /signin-google.
Forgot Password
/Account/ForgotPasswordClick the Forgot Password link to open the Forgot Password page.
Enter your login email and click the Submit button.
You will receive an email with a link to reset your password.
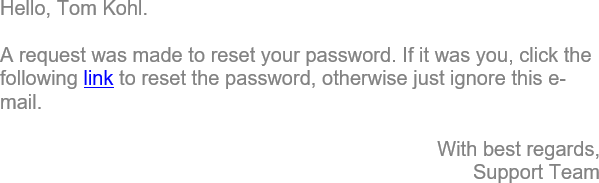
Click the link to open the reset password page. Enter your new password and a second time to confirm the new password:
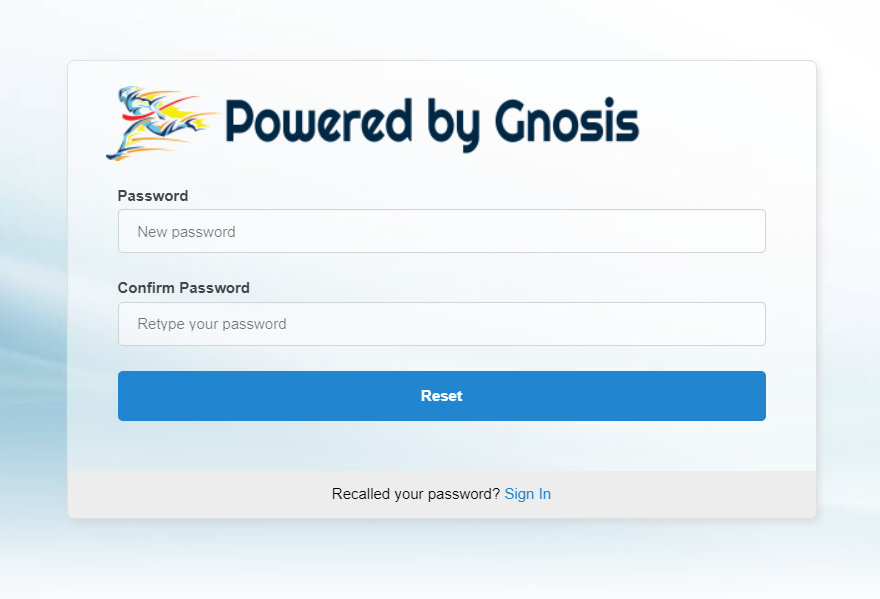
The reset password page is only valid for 24 hours. To generate a new reset key, select the Forgot Password link and begin again.
Forgot Password Email Template
Edit the ForgotPassword.gs Gnosis Script file to configure the Forgot Password email template in the Gnosis Files App:
/#dashbaord:filesFile path:
/templates/mail/ForgotPassword.gsUnlock User
After five failed attempts, the User will be locked out for five minutes. However, the Gnosis Administrator can unlock the User.
Open the Users tab in the Gnosis Identities App:
/#dashboard:identities:usersClick the unlock Action icon for the User who is locked out.
Reset Password
Users with the Administrator Role can reset User passwords from the Gnosis User App:
/#dashboard:identities:usersClick the Reset Password toolbar button (or on the key Action icon.)
This will open the Reset Password dialog.
Auto-generate—Select to auto-generate a compliant password.
New Password—Unselect the auto-generate and enter a compliant password.
Skip email notification—Select to send the Password Reset by Administrator email.
Force change on next login—Select to force the User to change the password on the next login.
An email with their new password is sent to the User.
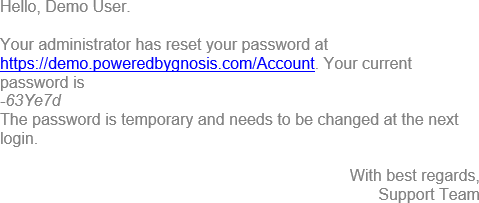
Reset Password Email Template
Edit the PasswordResetAdmin.gs Gnosis Script file to configure the Reset Password by Admin email template in the Gnosis Files App:
/#dashbaord:filesFile path:
/templates/mail/PasswordResetAdmin.gsUser Self-Registration
To allow users to self-register with the Application, set the AllowRegistration configuration setting to true in the Gnosis Configuration App:
/#dashboard:configOpen the Self-registration page:
/Account/Register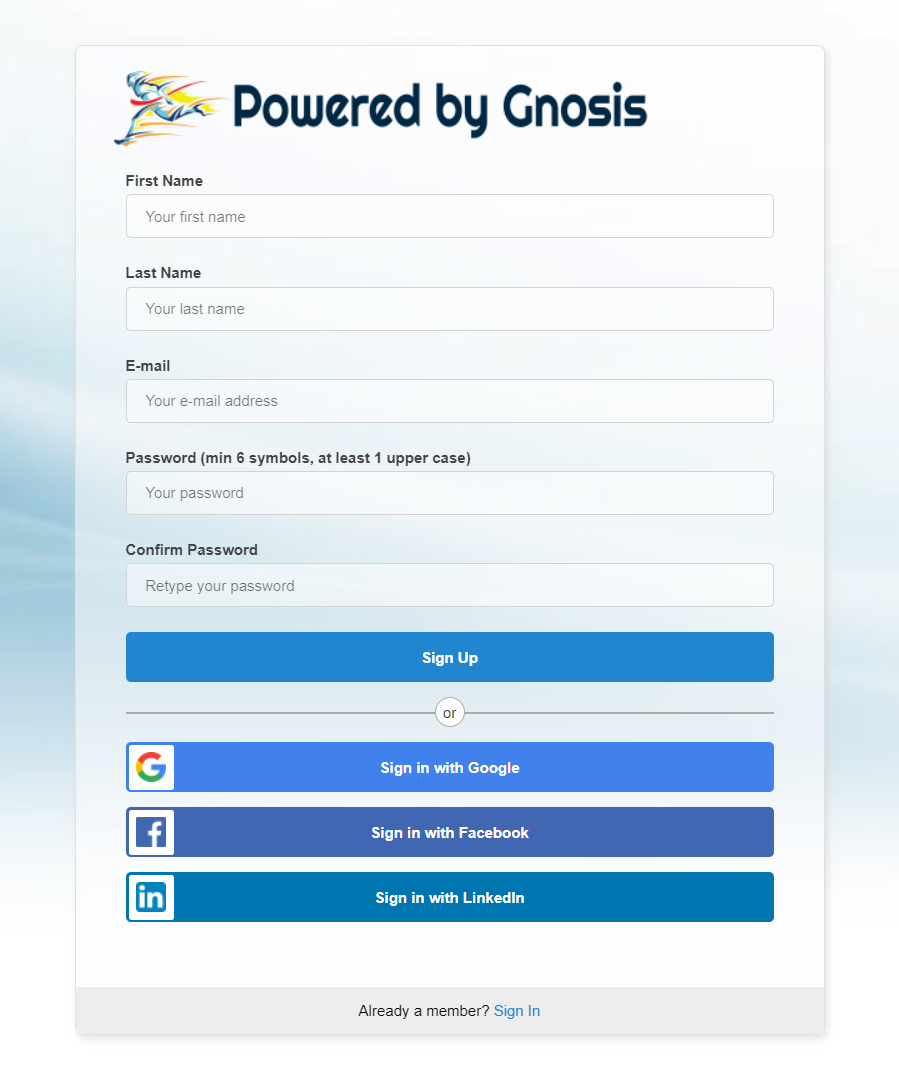
First Name—The User’s First Name.
Last Name—The User’s Last Name.
Email—The unique email address used to log in.
Password—The initial password to log in.
Confirm Password—Enter the password a second time to confirm the password entered.
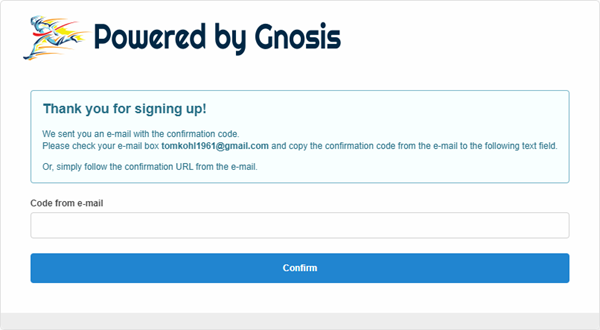
The new User Account is pending email confirmation. The User cannot log in until they confirm their email address. An email is sent to the User with a link to confirm the email address:
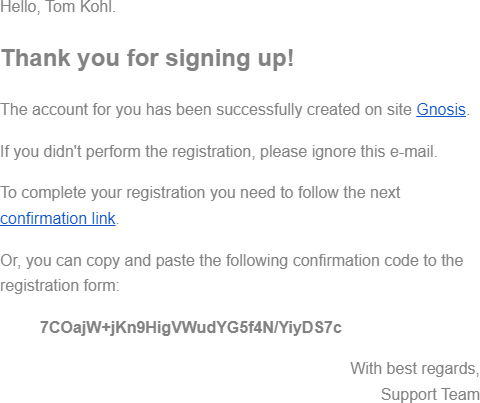
Click the confirmation link to open the new User User Email Confirmation page and enter the confirmation code sent:
Confirm Email Template
Edit the ConfirmEmail.gs Gnosis Script file to configure the Confirm email template in the Gnosis Files App:
/#dashbaord:filesFile path:
/templates/mail/ConfirmEmail.gsRegistration Confirmed URL
Set the RegistrationConfirmedUrl configuration to ???
User Created Event
It may be helpful when using self-registration to create a Solution EventHandler-type UserCreated View or a Solution UserCreated Workflow to assign the new User to a Team.
The EventHandler-type View, in this case, would call a background Task with the AddTeamMember Command:
CreateTask.Call({
	command = 'AddTeamMember',
	parameters = {
	  Team = @.Team,
	  Member = $Params?.User
  },
	user = $Params?.User == $User
	  ? GetUser('System Support')
	  : missing
})
This Gnosis Script creates a background task that adds the User to a Team.
External Self-Registration
Alternatively, users can register with their external social media accounts if configured. After self-registering with the external provider, the user information from the external provider is presented.
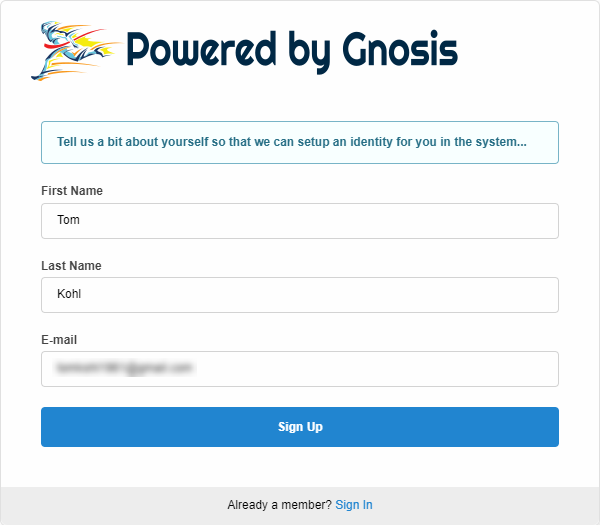
Make any changes and click the Sign-Up button to complete the new User Account confirmation process.

When users register with their external user account, a notification email is sent to them, similar to when they register with their email address and password.
The email will contain a temporary password for the new user account.
External Registration Notification Template
Edit the ExternalRegistrationNotification.gs Gnosis Script file to configure the External Registration Notification email template in the Gnosis Files App:
Open the Gnosis Files App:
/#dashbaord:filesFile path:
/templates/mail/ExternalRegistrationNotification.gsUser Profile
Users can change their details from the User Profile page.
/#dashbaord:profile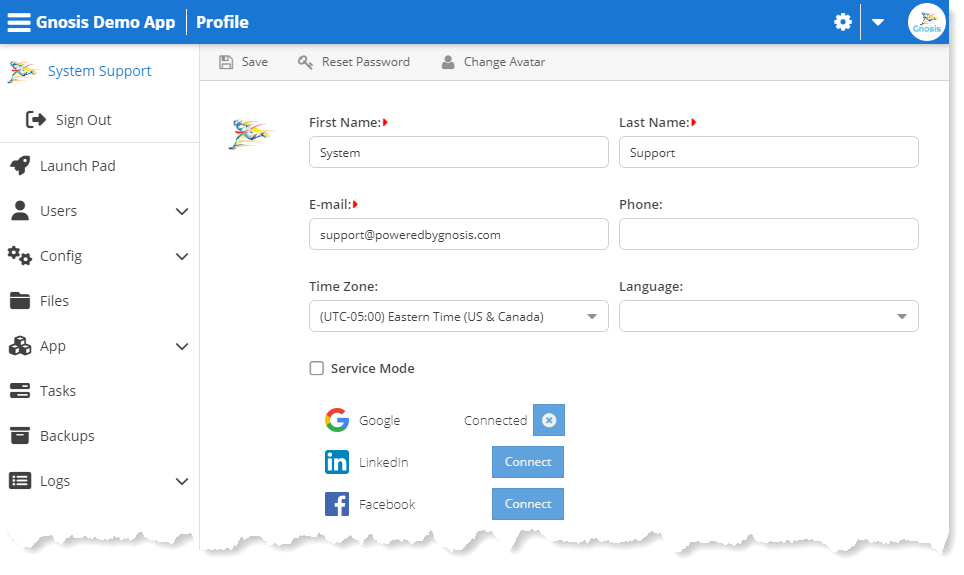
First Name—The User’s First Name.
Last Name—The User’s Last Name.
Email—The unique email address used to log in.
Phone—An optional phone number.
Time Zone—The time zone for the User.
Language—The language for the User.
Service Mode—Operates with fewer restrictions and ignores permissions, only available to users with Administrator Role.
Linked External Accounts—Link to external social user accounts.
Save—Save your changes.
Reset Password—Open the Reset Password dialog.
Change Avatar—Change the image for the Avatar.
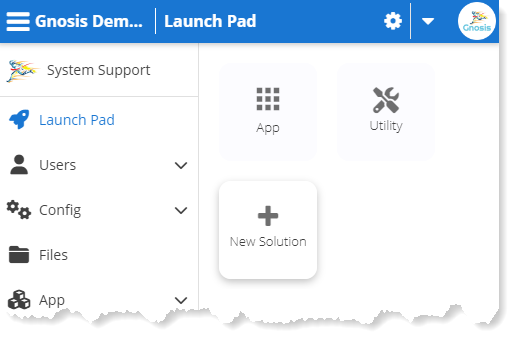
Launch Pad
The Launch Pad is the default landing page for users when they login to Gnosis. It arranges the Application Solutions as Tiles in a grid layout. Clicking on a Solution Tile opens the Explore View for the selected Solution.
/#dashboard/LaunchPadThe LaunchPad is the default, so the URL can be shortened:
/#dashboardThe dashboard is the default, so the URL can be shortened:
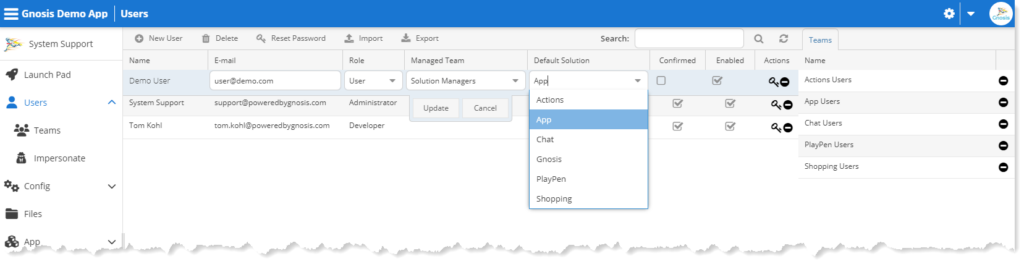
/#Default Solution
You can replace the Launch Pad as the default landing page for Users and Teams in the Gnosis Identities App:
/#dashboard:identities:users/#dashboard:identities:teamsSet the Default Solution for the User or Team, and the Explore View for the Solution will become the user’s landing page.
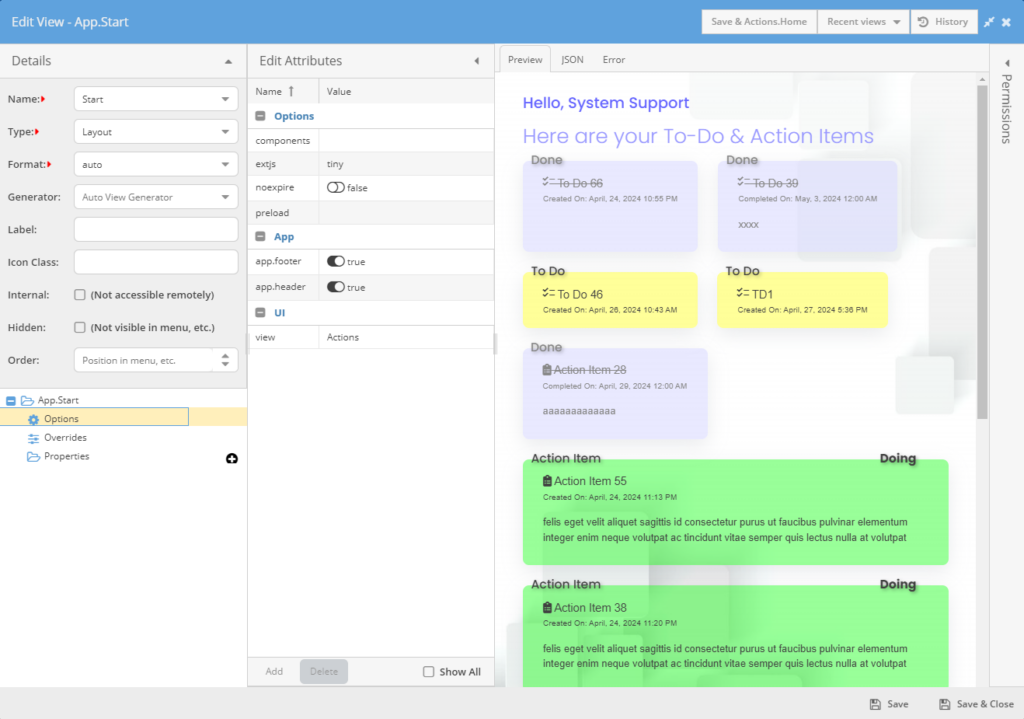
You can replace the Explore View as the default for a Solution with an Items-type View named Home.
If the Solution has a Layout-type View named Start, this will be used as the landing page.
If there is only one Solution for the App and only one Items-type Solution View, regardless of its name, it will become the landing page without setting the Default Solution.
Launch a New Solution
The New Solution button is only available to users with either the Administrator or Developer Role.
Click the New Solution button on the Launch Pad to create a new Solution, which opens the New Solution dialog.
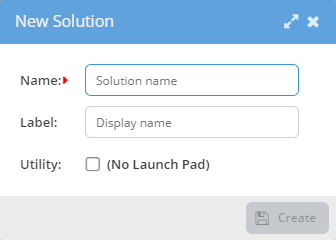
Name—The Solution name. The name is required and must be an alphanumeric string with no spaces or special symbols allowed.
Label—A label for the Solution.
Utility—Select to hide the Solution from the Launch Pad, which organizes Solution items to be utilized by other Solutions.
Explore Solution
Gnosis automatically creates a No-code auto-format Explore View for each Solution and is the default when opening the Solution from the Gnosis No-code App Launch Pad.
The Explore View lists the Item Types in the Solution as Tiles in a grid layout.
Clicking on an Item Type Title opens the No-code auto-format Items View for the Item Type, which is accessible by URL:
/#/{SolutionName}/Explore/[{ItemType}[.{ViewName}]]For example, to explore the Actions Solution by URL:
/#/Actions/ExploreTo explore the ActionItems Item Type in the Actions Solution by URL:
/#/Actions/Explore/ActionItemsTo explore a specific Items-type View named MyItems in the Actions Solution by URL:
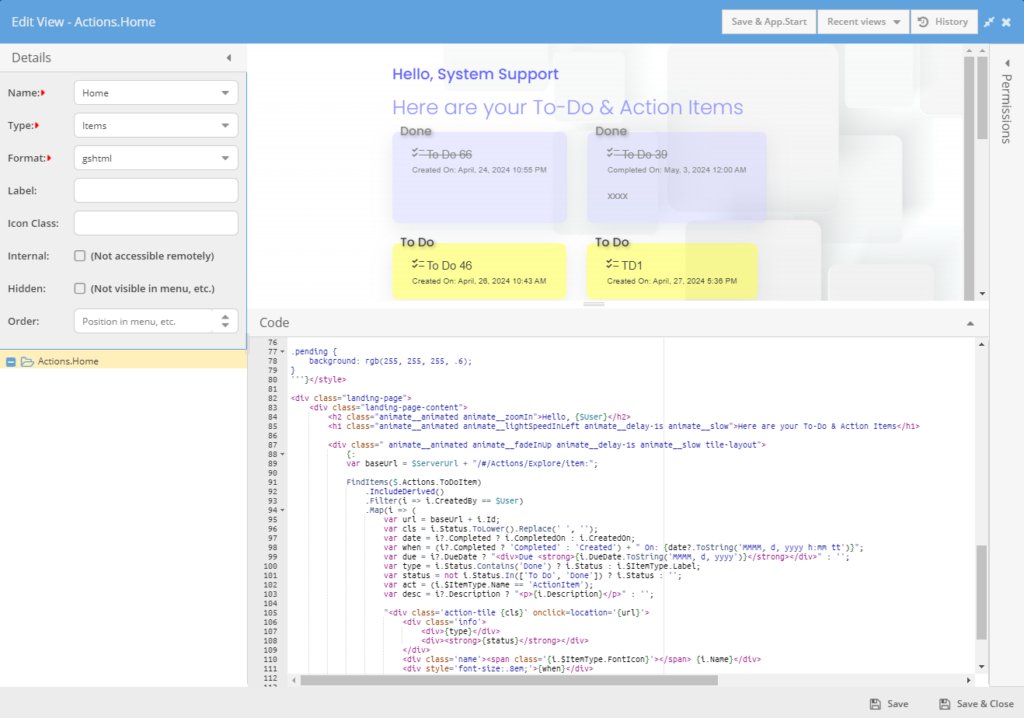
/#/Actions/Explore/ActionItems.MyItemsSolution Home View
/#/{SolutionName}You can replace the default Explore View with a Solution Items-type Home View.
The View format can be straight HTML, JSON, Gnosis Script (gs), or the most common gshtml Gnosis Markup Scripts format.
Solution Items-type Views
Solution Items-type Views are shown as buttons in the Gnosis No-code App Header.
They act like tabs, allowing the User to navigate between Solution Views.
Items
Gnosis automatically generates a No-code auto-format Items View for each Item Type, which is the default when opening the Item Type from the Explore View.
You can replace the Items View as the default with anything you want. Create an Items-type View for the Item Type, name it anything you want, and configure the View Order Setting to a lower value than the Items View Order setting value.
You can open an Items-type View directly by URL without the Explore View:
/#/{SolutionName}/{ItemTypeName}.{ItemsViewName}For example, to open the Items View of the ActionItems Item Type in the Actions Solution:
/#/Actions/Explore/ActionItemItems Count
The Items Count toolbar text field is the total Items for the Item Type.
New Item
The New {ItemTypeLabel} toolbar button opens the New Item dialog. The Gnosis No-code App will use the autogenerated New View for the Item Type. The View is highly configurable but can also be entirely replaced. There can be many New Views for different Identities.
Edit Item
The Edit toolbar button opens the Update Item dialog. The Gnosis No-code App will use the autogenerated Update View for the Item Type.
The View is highly configurable but can also be entirely replaced. There can be many Update Views for different Identities.
Inline Edit
Click the Inline Edit toolbar button to enable inline row editing. Select the row, and the inline row editor will appear.
Click the Update button to save your changes or the Cancel button to close the inline editor.
A Copy column appears with the Cut and Copy action icon buttons.
Double-clicking on the row edits the row rather than opening the Item View.
Delete Item
Select, or multi-select if configured, the Items you want to delete and click the toolbar Delete button permanently.
Next Menu
Depending on how the Items View is configured, the next Lifecycle States for the Item may appear in the Next menu button on the Item toolbar (and/or as buttons in the Next column in the Items grid.)
Select the Transition menu item (and/or action column button) choice to Promote the Item to its next Lifecycle State.
Actions Menu
Custom gsAction Views with an Action prefix for the View Name will appear in the Actions menu and column.
The selected Item is passed as the $Item in the Gnosis Script View.
Reports
You can create and run Reports from the Reports menu.
There are three ways to create Reports: Designer, Wizard, and query builder.
Designer
Wizard
Query Builder
Import Items
Opens the Import dialog to select and upload an Excel document for importing.
Export Items
Exports the current Item Grid to Excel.
Views Menu
Items-type Views are available in the Gnosis no-code Items View in the Views toolbar menu.
Users can configure the Items View columns, order and visibility, set filters, and save as a named View.
You can set any saved View as your default View for the Item Type and share your saved Views, allowing other users to see and use the View.
App Configuration Settings
The Administrator Role users can configure a few App Configuration settings.
App Web Page Title
Set the PageTitle configuration setting to set the web page title for the Gnosis App.
Auto View Generator
Set the AutoViewGenerator configuration setting to set the default Auto View Generator for the Gnosis No-code App to use.
Grid Filters
Set the AlwaysShowFilters configuration setting to true. If true, the filter row in the Gnosis no-code Items View is shown by default.
Each Items View can be configured individually to show/hide/exclude the filter row.
Multiselect Grid
Set the MultiselectGrid configuration setting to true to configure the Gnosis No-code App Items Grid to allow multi-select rows. This can be configured separately for each Item Type’s Items View.
Paging Grid
Set the PagingGrid configuration setting to true to configure the Gnosis No-code App Items Grid to use paging; otherwise, the grid will load dynamically as you scroll the grid.