Item Types
Item Types are used to model business items, including data, logic, and UI.
Item Types are Object-oriented and Lifecycle-driven Items with Logic, Views, and access controlled by Identity-based Permissions.
They are like a database table with columns (Properties) and rows (Items)—however, Gnosis stores application data in MongoDB, where Items are saved as JSON documents.
To manage Item Types, open the Gnosis Solutions App:
/#dashboard:app:solutions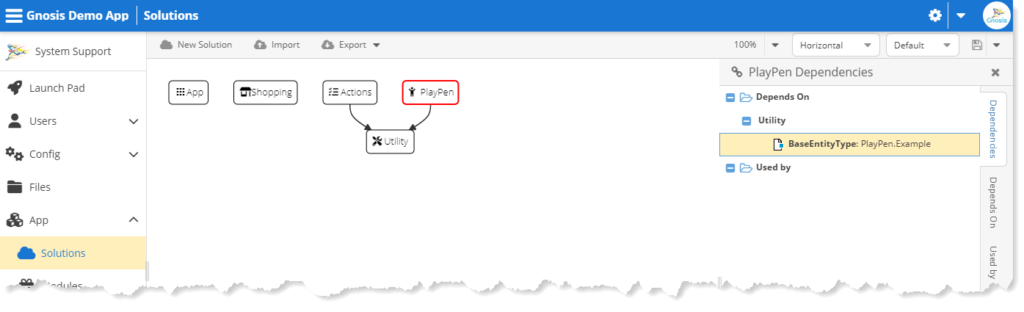
Double-click on the Solution Tile to open the Solution Configuration App:
/#configure:{SolutionName}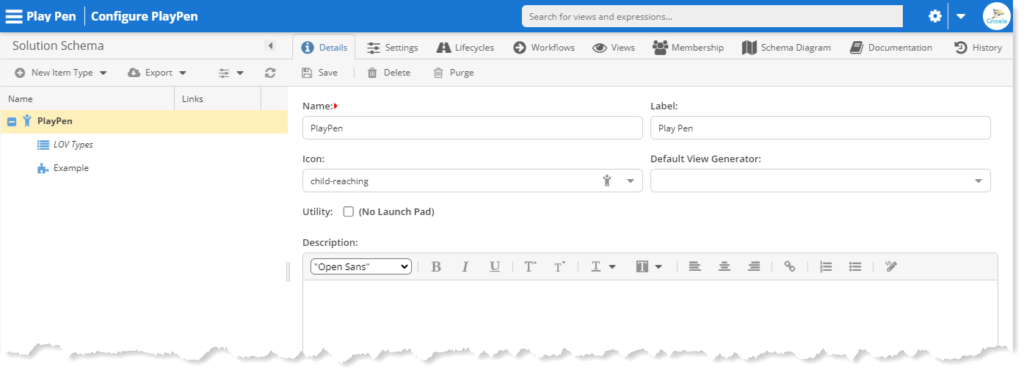
Item Type
Click the New Item Type toolbar menu button to select the kind of Item Type to create.
You can create new Item Types and Property Types from the root Solution node.
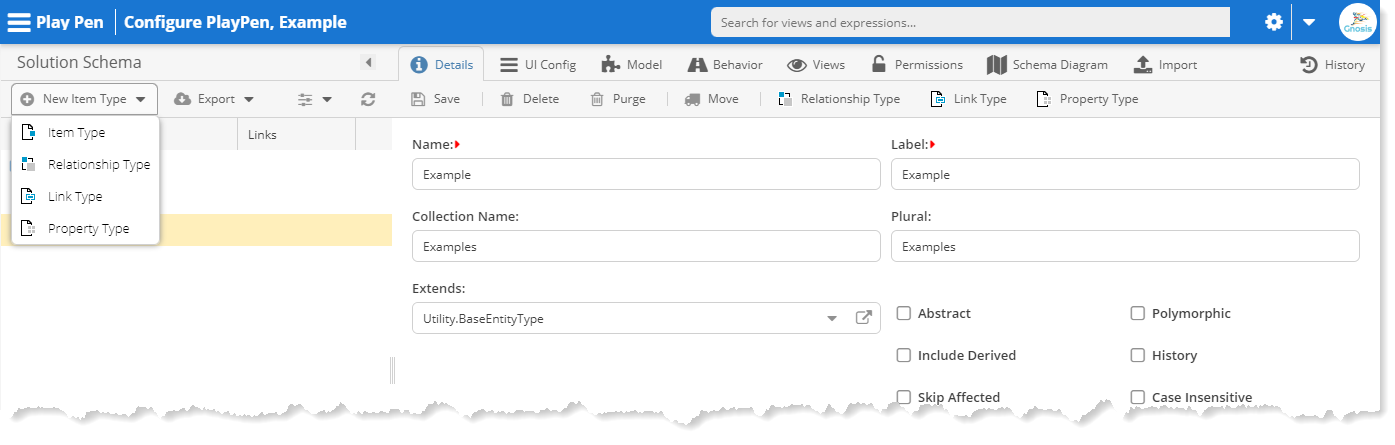
The new Relationship Type and Link Type menu items are available when selecting an Item Type sub-node.
The selected Item Type node will automatically be the Parent for the new Relationship and Link Type.
Property Type
Click the Property Type menu item to open the New Property Type dialog.
Property Types are added to the Solution Schema in the Properties Types folder.
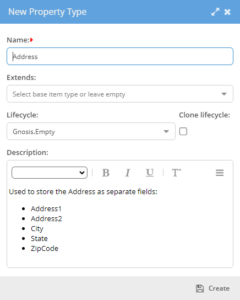
Name—The Item Type Name. The Name can contain only letters, digits, and underscore symbols, starting with a letter or underscore.
Extends—Select the Item Type as the base for the new Item Type.
Lifecycle—Select the existing Lifecycle for the new Item Type.
Clone Lifecycle—Clone the Lifecycle as the Lifecycle for the new Item Type.
Description—A description that can contain markup.
Property Types are like abstract Item Types in that they are not used directly to create items. Complex-type properties reference them.
Property Types do not have an ID, so they cannot be referenced.
However, they can have a Lifecycle, but only the Item Events are triggered.
The only reserved properties for Property Types are the Summary and LimitedTo properties.
Property Types referenced by Complex Properties are One-To-One relationships between the Item and the Complex property values.
Relationship Type
Relationship Types extend the Item Type with an additional reserved Parent reference-type property for specifying the Parent Item Type in the relationship.
The Parent Item is the master in the relationship. Therefore, Relationship Items are deleted when the Parent Item is deleted.
Relationship Types can have a distinct Lifecycle from the Parent Item Type.
The Relationship Type referenced by the reserved Parent property is a One-to-Many relationship.
Link Type
Link Type extends the Relationship Type with an additional reserved Child reference-type property for specifying the Child Item Type in the relationship.
Since the Link Type extends the Item Type, you can define properties on the link itself.
The Parent is the master in the relationship, so Linked items are deleted when the Parent Item is deleted; however, the Child Item is not deleted.
Link Types can have a distinct Lifecycle from the Parent Item Type.
The Link Type referenced by the Parent and Child properties is a Many-To-Many relationship (many parents can use any child.)
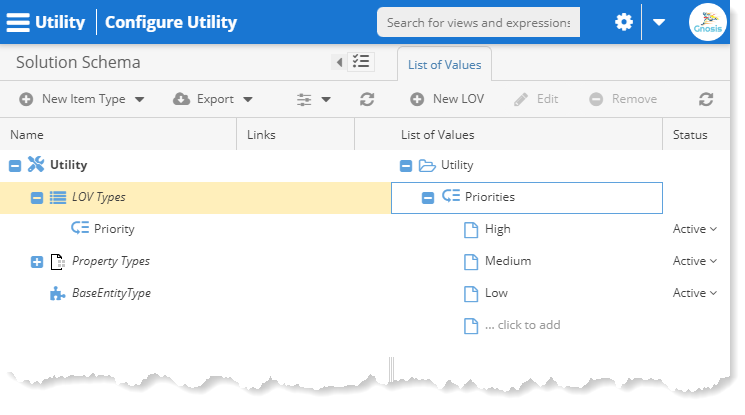
List of Values (LOV)
List-of-Values Types derive from the Platform Gnosis.LOV Item Type. They are shown in the Solution Schema tree as the LOV Types node.
Select the LOV node to open the LOV Editor to add, update, and reorder list values.
LOV Item Types are referenced by PickList properties just like any other. Except that, because they derive from LOVs, the No-code App shows them as a simple dropdown control because they are lists of values.
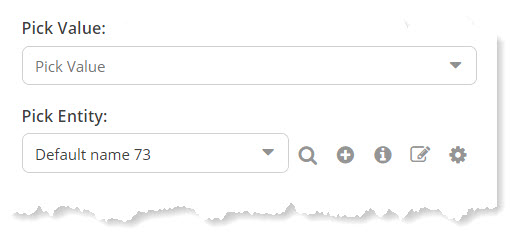
Conversely, the dropdown for ordinary Item Types is more robust, allowing for grouping, searching, editing, and creating new items.
Each Item Type, including LOV, can be configured to show any action icons you want.
New LOV
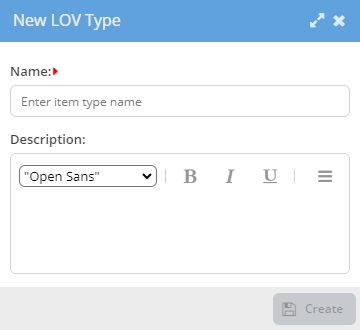
Click the New LOV toolbar button to open the New LOV Type dialog.
Name—The LOV Type Name. The Name can contain only letters, digits, and underscore symbols, starting with a letter or underscore.
Description—A description that can contain markup.
Edit LOV
Click the Edit toolbar button to open the Item Type Configuration dialog. The same User Interface appears when you select the LOV Type on the Solution Schema tree.
Remove LOV
Select the LOV and click the Remove toolbar button to delete the LOV Type. You will not be able to delete it if it is in use.
Details
Select the Item Type node on the Solution Schema tree to open the Item Type Details.

Name—The Item Type Name is required and may contain only letters, digits, and underscore symbols, starting with a letter or underscore.
Label—The Item Type Label.
Collection Name – The database collection name.
Plural—The plural Label for the Item Type.
Extends—The base Item Type for the Item Type.
Abstract—If true, the Item Type is not used directly but as a base for other Item Types.
Polymorphic—If true, allow Items derived from this Item Type to be interchangeable and change Type.
Include Derived—If true, derived items are automatically included in queries without calling the IncludeDerived() function. The same applies to the API default behavior—if you didn’t specify the derived flag, you get auto-included derived items.
History—If valid, automatically keep a history of the Item changes.
Skip Affected—If true, items of this type will not be included in the $AffectedItems variable, and real-time notifications will not be fired when an Item is modified.
Case Insensitive—If true, when searching textual fields, the case is ignored.
Description—A description for the Item Type and can contain markup.
Indexes—Property indexes for improved query performance. Put indexes on separate lines. Use comma-delimited property names for multi-property indexes.
Save Changes
Click the Save toolbar button to save the Item Type detail changes.
Remove
Click the Remove toolbar button to delete the Item Type. The Item Type will not be deleted if referenced.
Purge Archived Items
Click the Purge Archived toolbar button to delete the Items in the Archived State permanently.
Move Item Type
Click the Move to Solution toolbar button to relocate the Item Type to a different Solution.
Convert to Relationship Type
Click the Convert to Relationship toolbar button to open the Convert to Relationship dialog. Required PickList-type properties for the Item Type are candidates to become the Parent reference property. Alternatively, you must select the Item Type as the Parent for the new Relationship Type.
Convert to Link Type
Click the Convert to Link toolbar button to open the Convert to Link dialog. The required PickList-type properties for the Item Type are candidates to become the Parent or Child reference properties. Alternatively, you must select the Item Type as the Parent and Child for the new Link Type.
Convert to Property Type
Click the Convert to Property Type toolbar button to open the Convert to Property Type dialog.
UI Config
You can configure how the Item Type appears in the No-code App.
- Main Nav—The Item Type will appear in the main navigation menu.
- All Tabs—Show the All tab when it derives from another Item Type.
- Font Icon—An icon for the Item Type.
PickList Control Options
You can configure how the dropdown control will appear for PickList properties in the No-code auto-format Views for the Item Type:
- Dropdown—Show the Items in a dropdown.
- Search—Show the search icon to open a Search dialog.
- New—Show the add icon to open a New Item dialog.
- Expand—Show the expand icon to open the Item inline.
- Edit—Show the edit icon to open the Update Item dialog.
Model
Properties represent the Item Type data model. A Property is a data type that describes the data being stored, similar to a column in a table for storing data in a database. However, a Property also has a Label, Description, Constraints, and other attributes specific to the data type.
Item Types can have as many properties as needed to describe and model the business item. But there is a set of reserved properties that every Item Type has:
ID
The Item ID is a unique 32-character GUID (globally unique identifier) string. It is automatically generated when the Item is created and cannot be changed.
The ID is indexed and is the primary key for referencing the Item.
Name
The Item Name property is a String used to name the Item.
The Name property is non-unique by default. However, you can configure it to be unique across archived items, Relationship items, and all items derived from the same base Item Type.
The Name Property is indexed.
Summary
The Item Summary property is an Expression data type used to label the Item.
The default Summary expression is:
$ItemType.Relationship == 'Link'
    ? $Item.Child.Summary
    : $ItemType.Properties?.Name
        ? $Item.Name
        : $ItemType.Label
This expression says to use the Summary from the Child Item if the Item is a Link Type. Otherwise, use the Name for the Item if the property exists (Property Types do not have a Name by default); otherwise, use the Label of the Item Type for the Item.
You can return any string value you want from the Summary expression, including HTML markup:
var priority = $Item.Priority;
var color = Priority == "High" ? "FF6600" : "00CCFF";
var weight = Priority == "High" ? "800" : "500";

// Highlight the Name if High priority.
"<font style='font-weight:{weight}; color:#{color};'>{Name}</font>
- {CreatedBy} on {CreatedOn.ToString('MMM. dd, yyyy')}"
Sequence
The Item Sequence property is a Float data type used to order items. It is the default sort order for Relationship and Link Type items.
The user or Application Logic can change the value.
Created On
The Item CreatedOn property is a DateTime data type set to the date and time the Item was created.
The value cannot be changed.
Created By
The Item CreatedBy is a User data type referencing who created the Item.
The value cannot be changed.
Updated On
The Item UpdatedOn property is a DateTime data type set to the date and time the Item was last updated.
The value cannot be changed.
Updated By
The Item UpdatedBy is a user data type referencing the last User who updated the Item.
The value cannot be changed.
Status
The Status is the Item’s current Lifecycle State and is changed by Promoting the Item to its next state
Limited To
The LimitedTo is an Identity referencing a User or Team with access to the IItem
This provides a level of access control over Solution Permissions. A User may be a member of an Identity at the Solution Level but must also be a member of the Identity for the LimitedTo property to be granted access.
CanReadRemote
The CanReadRemote adds deny remote read access control for the Item “Can I still.”
A property must return a Boolean with a false value to deny read access to the IItem
So, the property’s data type can be a Boolean or Expression that returns a Boolean value, which allows for dynamic access control based on any logic you want.
To restrict remote reading to all items for an Item Type, you would add a CanReadRemote Property of the Boolean data type and set the Default Value to false.
CanUpdateRemote
The CanUpdateRemote adds the option to deny remote update access control for the IItem
A property must return a Boolean with a false value to deny update access to the IItem
So, the property’s data type can be a Boolean or Expression that returns a Boolean value, which allows for dynamic access control based on any logic you want.
To restrict remote updating to all items for an Item Type, you would add a CanUpdateRemote Property of the Boolean data type and set the Default Value to false.
CanDeleteRemote
The CanDeleteRemote adds the option to deny remote delete access control for the IItem
A property must return a Boolean with a false value to deny delete access to the IItem
So, the property’s data type can be a Boolean or Expression that returns a Boolean value, which allows for dynamic access control based on any logic you want.
To restrict remote deleting all items for an Item Type, you would add a CanDeleteRemote Property of the Boolean data type and set the Default Value to false.
Behavior
The Item Type Behaviour is where you can configure the Lifecycle and Item Events for the Item Type.
Views
Item Type Views are used for everything from UI, Application Logic, and custom Web APIs.
Permissions
Users must be granted Permission to perform CRUD (Create, Read, Update, and Delete) operations on Items for the Item Type.
In addition, the Lifecycle State also controls Permissions. For example, a User may have Permission to Update an Item while it is in the Draft State but no permission to Update while it is in the Review State.
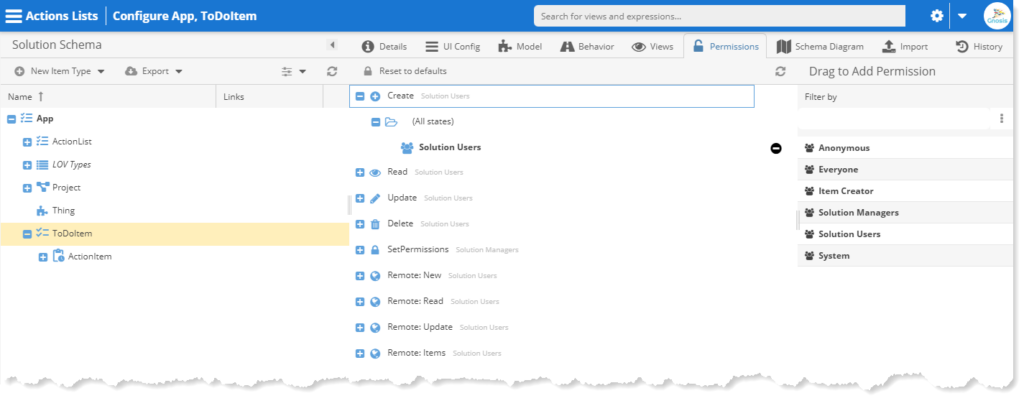
Create Item
Create Permission allows the User to create new Items.
Only the All States option is available because no states are applicable.
Read Item
Read Permission allows the User to get items for the Item Type.
Assign Identities to the Lifecycle States to grant the ability to get Items in the specified state.
You can also use the CanReadRemote Item Property to dynamically deny the ability to get items based on a Property Expression.
Update Item
Update Permission allows the User to update items of the Item Type.
Assign Identities to the Lifecycle States to grant the ability to Update items in the specified state.
You can also use the CanUpdateRemote Item Property to dynamically deny the ability to update items based on a Property Expression.
Delete
Delete Permission allows the User to delete Items. Assign Identities to the Lifecycle States.
Assign Identities to the Lifecycle States to grant the ability to Delete items in the specified state.
You can also use the CanDeleteRemote Item Property to dynamically deny the ability to delete items based on a Property Expression.
Set Permissions
Set Permissions allows Users other than Administrators and Developers to configure Permissions (LimitedTo property).
Only the All States option is available because no states are applicable.
Views Permissions
Views have Permissions that control when the user has access to CRUD and Items-type Views.
Assign Identities to the Lifecycle States to grant access to the View in the specified state
View Permissions can also be configured in the Permissions pullout in the Gnosis View IDE.
Schema Diagram
Import
Items can be imported using the automatically generated Import Script for the Item Type. The Script allows you to upload an Excel document with a header row with the Property Name or Label as the column header value.
You can change the Import Script and perform Imports from the Item Type Import App.

Save—Save the changes to the Import Script.
Run Importer—Opens the Import View dialog.
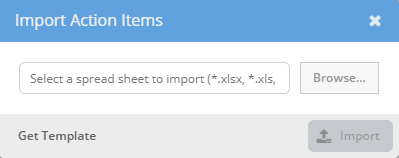
Import can be performed by clicking the Run Importer toolbar button as a Developer, and end users can click the Import toolbar button on Items Views if enabled to perform an import.
Get Template—Download an Excel document template with all the Properties as columns and the Property Label as the column header.
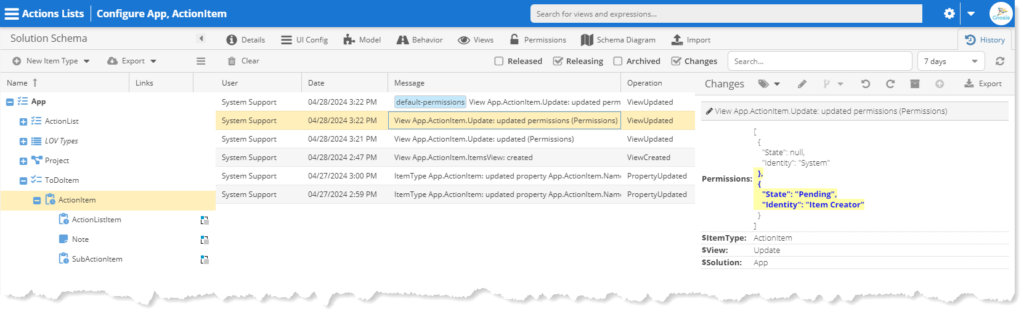
History
All changes made to the Item Type are tracked. This allows for the release of app module versions.
Data Modeling Guidance
Gnosis provides many options for designing your Solutions and Business Objects; sometimes, there is more than one way to skin the cat to use the clique. The following provides the methodology for determining how and when to use the different data modeling techniques.
When to Extend an Item Type
When an Item Type already exists that matches your needs, even in some other Solution, you need to augment it with additional properties.
Or it nearly matches your needs, and you need to change, “overload,” or replace, as you like, the data types for one or more of its properties.
You cannot remove inherited properties, so if the Base Item Type has additional properties not needed in the new sub-Item Type, consider separating those properties into its sub-Type.
Another reason to create sub-Item Types even when no property overloading or additional properties are required is when you need different Lifecycles. Here, the Base Type defines the properties for all the sub-types, and each sub-type defines the unique Lifecycles.
Note, however, that with conditions on Lifecycle State Transitions, depending on how different your sub-Type Lifecycles are, you may not need sub-Types. So, create sub-types for each unique Lifecycle for the Base Type if using State Transition Expressions makes the one Lifecycle overly complex to design and manage.
When to use a Link Type
When you need a Many-to-Many relationship, the Link Type is the table you’re linking if you like.
When you need information on the relationship between the Items, a Bill-of-Material “BOM” is a good example, where you have a Part-to-Part relationship, and there is data about the relationship, such as quantity and effective date.
When the Parent Item and its Relationships are removed, the Child Linked Item needs to remain.
When the Linked Item needs to be referenced by other Link Types or Reference “Pick List” Properties.
When to Extend a Relationship Type
When the relationship data is the same for more than one Relationship Type.
It is possible to convert an Extended Relationship Type to a Link Type if you later decide that the relationship data needs to be separated so that other Items may reference the Item.
When to use a Property Type
When a Property needs to be Complex, it is a composite of several fields, and you need to use the composite more than once. An Address is a good example: it has several address lines and city, State, and postal code fields.