Users, Teams, & Identities
Identities
A User Account is required to log in to a Gnosis Application. Each User Account is a Gnosis Identity, with the User’s first and last names as the Identity Name.
A Team, also a Gnosis Identity, is a collection of User Identities that form Member/Membership relationships. Teams can include other Teams as members, allowing for hierarchical Identities.
Gnosis Identities control the ability to create, update, view, and promote items and execute API methods.
Users
/#dashboard:identities:users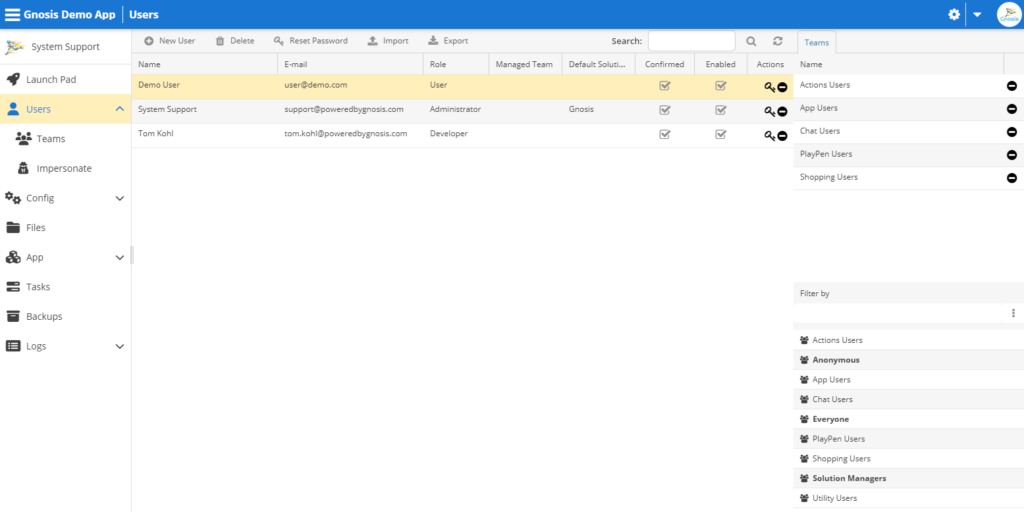
New User
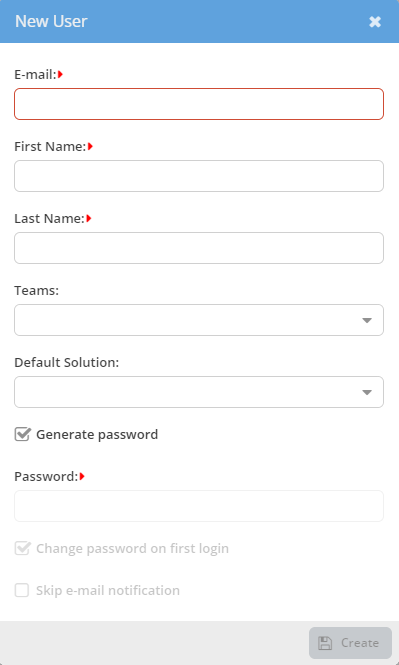
A User Account is required to log in to Gnosis. Click the New User toolbar button to open the New User dialog.
- Email—An email is required, and it must be unique. It can be changed after creating the User Account but must remain unique.
- First Name—A First Name is required but does not need to be unique. This cannot be changed.
- Last Name—A Last Name is required but does not need to be unique. It cannot be changed.
- Teams—Multiselect the Teams for the User. The User’s team membership can be managed after creating the User Account.
- Default Solution—Select the Starting Solution for the User.
- Generate password—A random secure password will be created for the User Account.
- Password—A custom password for the User Account if the Generate password is unselected.
- Change password on login—Forse the User to change the password on initial login.
- Skip email notification—Do not send the auto-generated New User Confirmation email.
Account Created Email
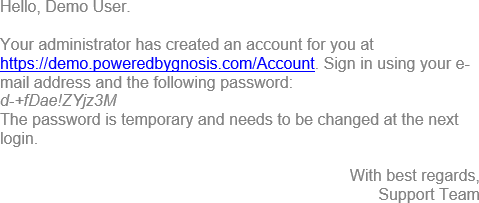
A new user welcome email is sent to the email address provided when the user account was created.
The email content can be changed in the /templates/mail/AccountCreated.gs file.
Delete User
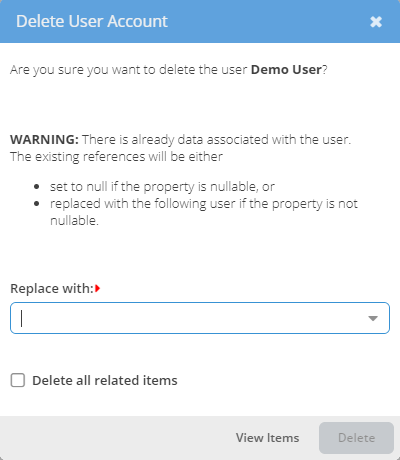
Click the trashcan icon in the Actions column to delete a User Account. The data for the User can either be assigned to another User or deleted.
- Replace with—Select the User to assign the existing data for the User being deleted.
- Delete all related items—Select the checkbox to delete all the data related to the User being deleted.
Reset Password
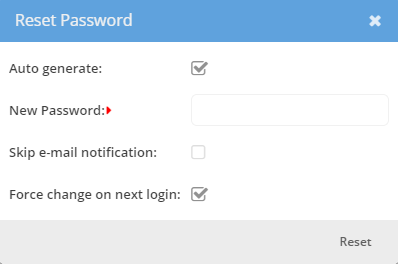
Reset the User Account login password.
- Auto generate—A random secure password will be created for the User Account.
- New Password—A custom password for the User Account if the Generate password is unselected.
- Skip email notification—Do not send the auto-generated New User Confirmation email.
- Change password on login—Forse the User to change the password on initial login.
Reset Password Email
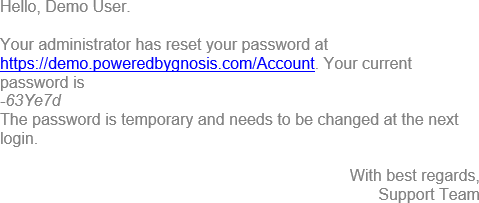
A reset password email is sent to the email address for the selected user account.
The email content can be changed in the /templates/mail/PasswordResetAdmin.gs file.
User Email
The Email can be changed after creating the User Account but must remain unique.
User Role
New User Accounts are assigned a User Role. The User’s Role can be changed after creating the User Account.
Double-click on the User row to enable the inline editor to change User configuration values. Select the Role cell to select the Role for the User.
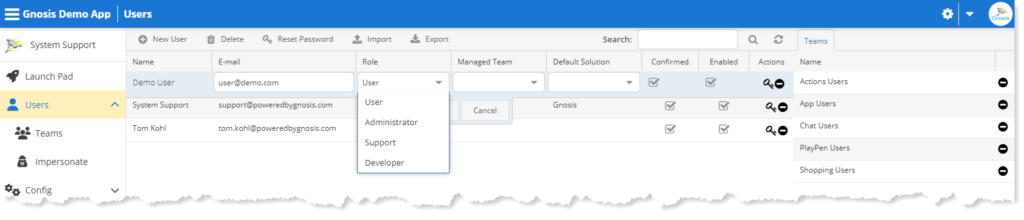
Administrator Role
The Administrator Role is capable of performing all the Developer Role functions plus the following Administration functions:
- Manager Users and Teams
- Build/Install & Import/Export Solutions
- Manage Resources
- Manage Background Tasks
- View Security and Error Logs
Developer Role
The Developer Role is capable of performing the following functions:
- Manager Users and Teams
- Manage Solutions
- Build & Install Solutions
- Manage Resources
- Manage Background Tasks
- View Error Logs
Support Role
This Support Role is helpful in production instances where there are generally no Developer role users. It allows for opening the Gnosis Scripting console and acquiring additional information.
User Role
The User Role is assigned to the Gnosis Application’s end users. There are no special capabilities, and the application defines all permissions.
Manage Teams
Set the Managed Team field to a Team Name to allow the User to manage Users, Teams, and the Team Members for the Team assigned.
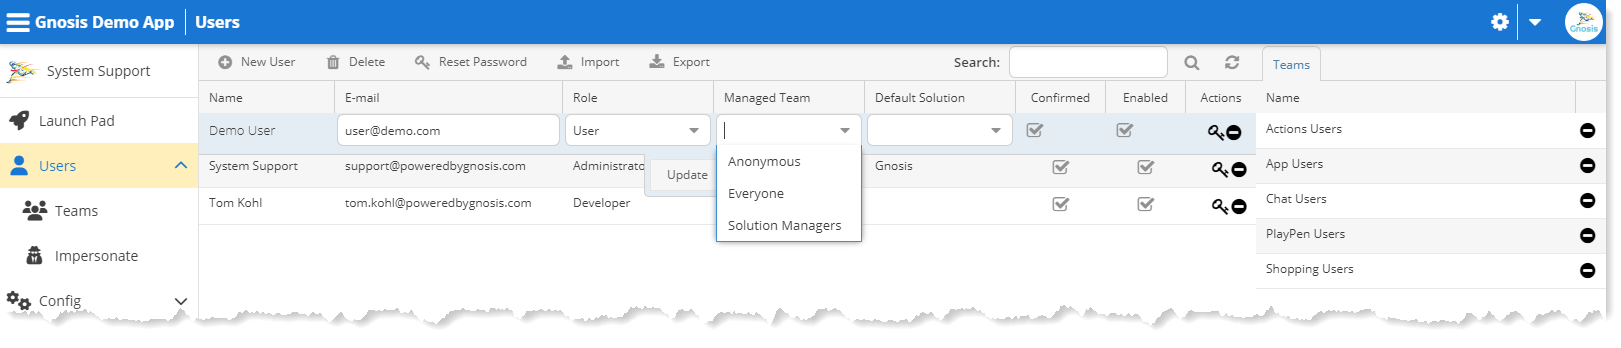
The Users and Teams tabs are enabled so the User with Manage Team control can manage the Users and Team Memberships for the assigned Team.
Default Solution
Set the default Solution for the User or Team.
Confirmed
The User cannot log in until the User Account is confirmed.
Enabled
The User Account must be enabled to allow the User to log in.
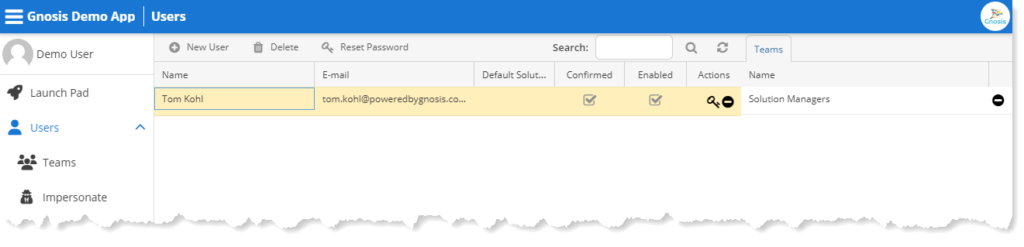
Teams tab
The Teams tab lists the Teams of which the User is a member. Below the list are the available Teams. You can drag and drop them into the Member of Team list.
Remove Team Membership
Click the remove icon in the action column to remove the User from the Team.
Import Users
Click the Import toolbar button to open the Import User dialog. Click the browse button to open a file selection dialog. Select the User XML file to import. Click the Import dialog button to upload and import the select Users XML file.
Import Users from an XML file. The following is an example of a User(s) XML file:
<users>
  <user email="dev.user@poweredbygnosis.com" role="Developer" firstName="Dev" lastName="User" passwordHash="">
    <memberOf>
      <team>Solution Managers</team>
      <team>DemoSolution Users</team>
    </memberOf>
  </user>
  <user email="end.user@poweredbygnosis.com" role="User" firstName="End" lastName="User" passwordHash="">
    <memberOf>
      <team>DemoSolution Users</team>
    </memberOf>
  </user>
</users>
Export Users
Click the Export toolbar button to export the Users into an XML file.
User Events
User Events can trigger Workflow and EventHandler-type Views to perform any Application Logic.
Name the Workflow and EventHandler View after the Event Name. When the Event occurs, all matching Workflow and EventHandler Views are executed.
EventHander-type Views must be of gsAction format.
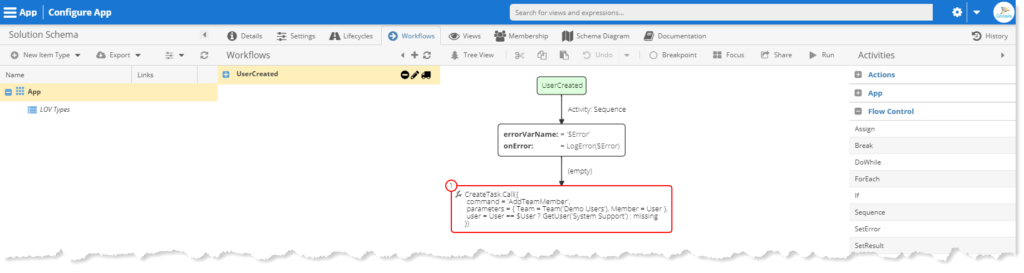
UserCreated
The UserCreated Event is triggered after the new User is created.
You can create a User from the Gnosis Identities App. You can also create a User with the built-in CreateUser Task Command.
The new User is passed to the Event Handler as the $Params.User variable.
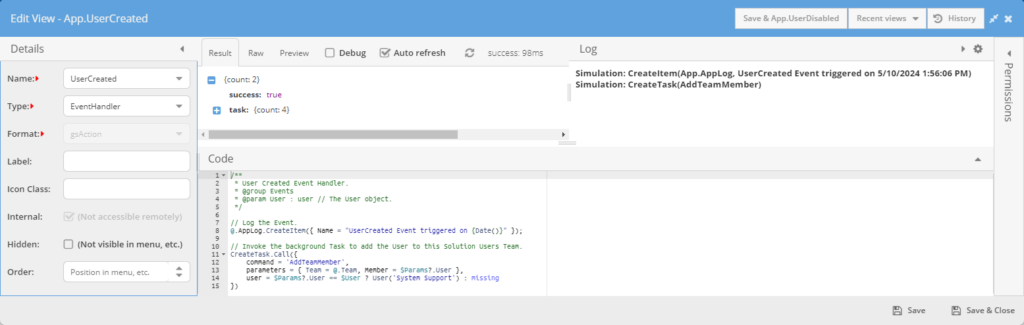
The following is an example UserCreated Workflow Event Handler:
The following is an example UserCreated EventHanler-type View:
UserDeleted
The UserDeleted Event is triggered before the User is deleted. If the Event Handler encounters an error, the Event is canceled, and the User is not deleted.
You can delete a User from the Gnosis Identities App or with the built-in DeleteUser Task Command.
The User is passed to the Event Handler as the $Params.User variable.
The following is an example UserDeleted EventHanler-type View to prevent the User delete:

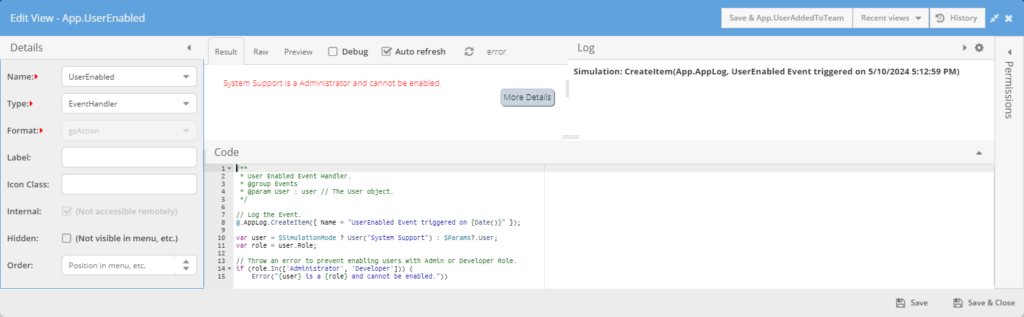
UserEnabled
The UserEnabled Event is triggered before the User is enabled. If the Event Handler encounters an error, the Event is canceled, and the User is not enabled.
You can enable a User in the Gnosis Identities App. You can also enable a User with the built-in EnableUser Task Command with Enabled = true.
The User is passed to the Event Handler as the $Params.User variable.
UserDisabled
The UserDisabled Event is triggered before the User is disabled. If the Event Handler encounters an error, the Event is canceled, and the User is not enabled.
You can disable a User in the Gnosis Identities App or with the built-in EnableUser Task Command with Enabled = false.
The User is passed to the Event Handler as the $Params.User variable.

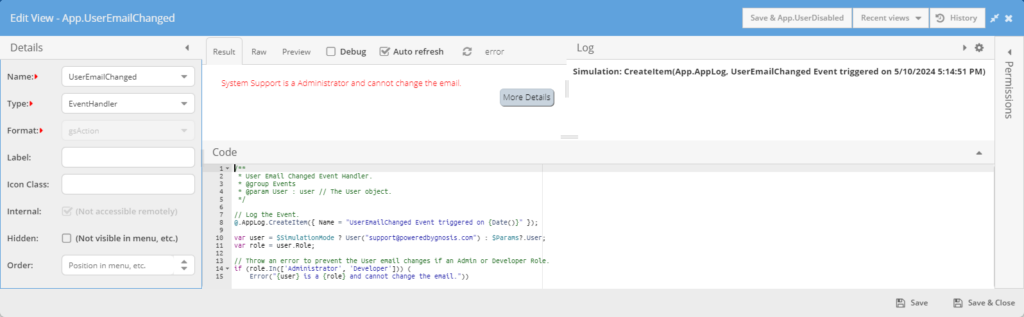
UserEmailChanged
The UserEmailChanged Event is triggered before the User email is changed. If the Event Handler encounters an error, the Event is canceled, and the User email is not changed.
The User is passed to the Event Handler as the $Params.User variable.
UserDetailsChanged
The UserDetailsChanged Event is triggered when the User details are updated.
The User can change the User Details from the Gnosis Profile App or with the built-in UpdateUser Task Command.
User Details:
- Email: String—Required user email.
- FirstName?: String—New the first name.
- LastName?: String—New last name.
- PhoneNumber?: String—New phone number.
- Language?: String—New language.
- TimeZone?: String—New time zone.
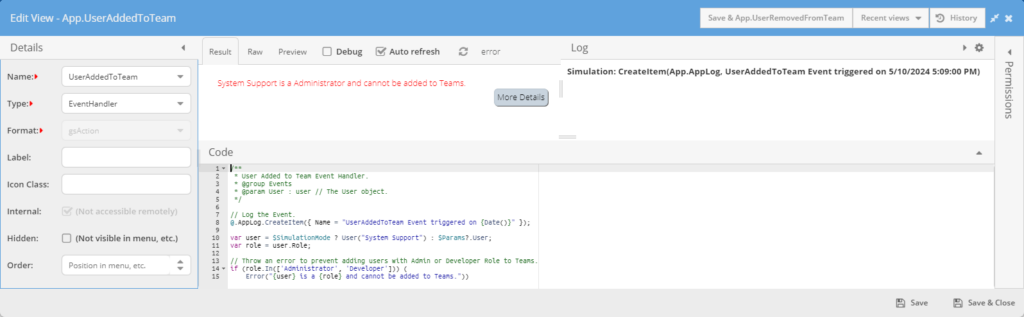
UserAddedToTeam
The UserAddedToTeam Event is triggered before the User is added to a Team. If the Event Handler encounters an error, the Event is canceled, and the User is not added to the Team.
You can add a User to a Team from the Gnosis Users App or with the built-in AddTeamMember Task Command.
The User is passed to the Event Handler as the $Params.User variable.
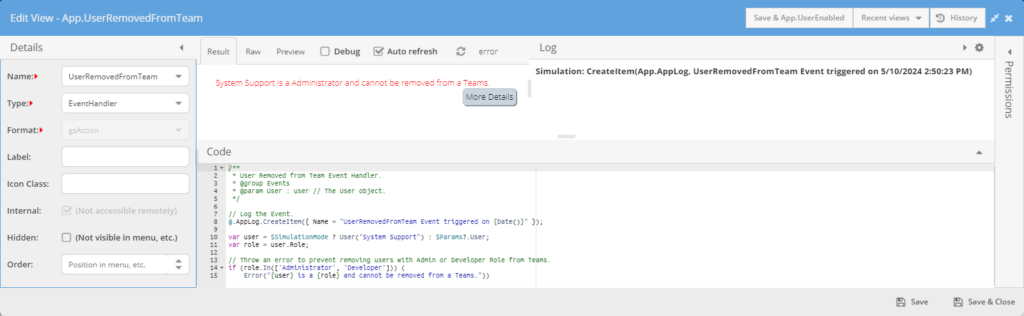
UserRemovedFromTeam
The UserRemovedFromTeam Event is triggered before the User is removed from the Team. If the Event Handler encounters an error, the Event is canceled, and the User is not removed from the Team.
You can remove a User from a Team from the Gnosis Users App. You can also remove a User with the built-in RemoveTeamMember Task Command.
The User is passed to the Event Handler as the $Params.User variable.
Teams
/#dashboard:identities:teams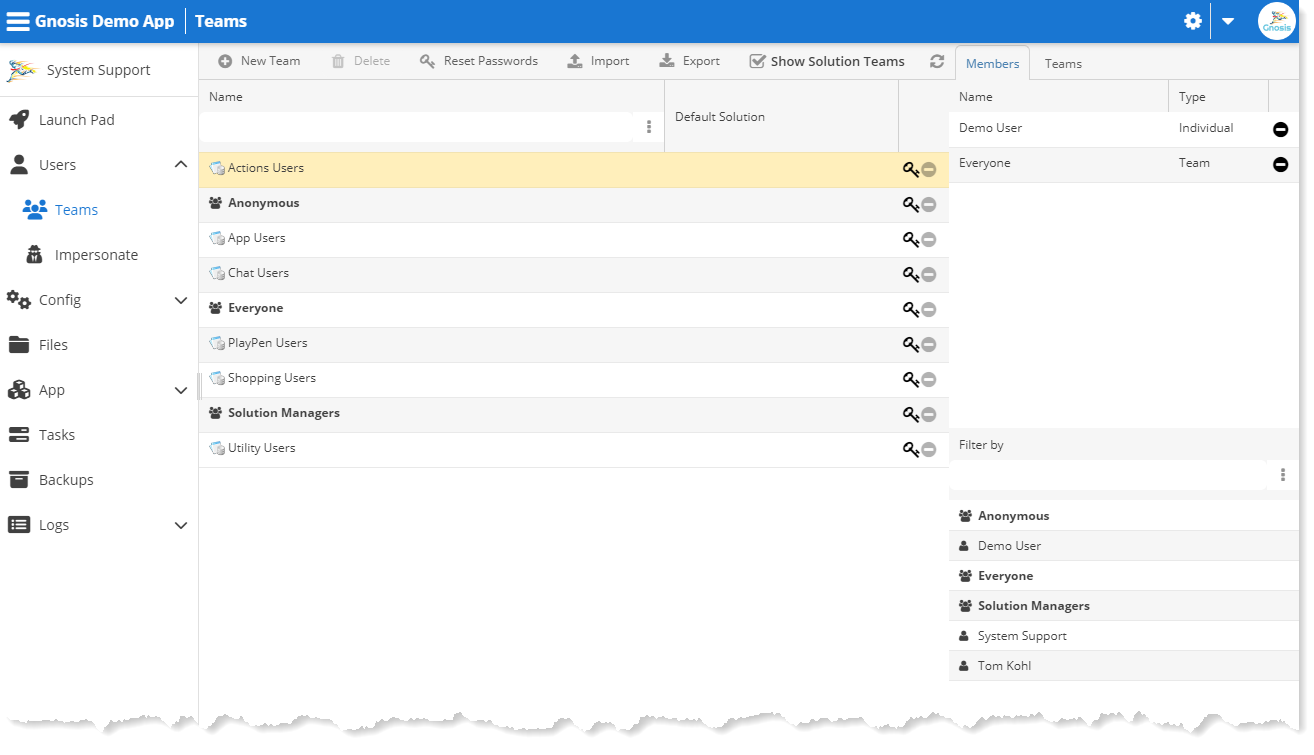
A Team is a collection of User Identities forming a Member/Membership relationship. Teams can include other Teams as members, allowing for hierarchical Identities.
New Team
Click the New Team toolbar button to open the New Team dialog. The Team Name may contain only letters, digits, underscore symbols, and spaces.
Anonymous and Everyone are reserved Team Names.
Show Solution Teams
Solution Teams are automatically created for each Solution. The Solution Team Name is the Solution Name with Users appended. By default, the Everyone Team is automatically added as a member.
Typically, Solution Team Membership is managed in the Solution Membership tab. As such, these are excluded to reduce the names shown. Click the Show Solution Teams to show these Teams.
Members
The Members tab lists the member Identities, either a User or Team of the Team. Below the list are the available Identities you can drag and drop into the Members list.
Remove Membership
Click the remove icon in the action column to remove the User from the Team.
Teams
The Teams tab lists the Teams to which the Team is a member. Below the list are the available Teams, which you can drag and drop into the Member of Team list.
Remove Membership
Click the remove icon in the action column to remove the Team from the Team.
Import Team
Click the Import toolbar button to open the Import Teams dialog. Click the browse button to open a file selection dialog. Select the Teams XML file to import. Click the Import dialog button to upload and import the select Teams XML file.
The following is an example of a Teams XML file:
<teams>
  <team name="Demo Users Managers">
    <memberOf>
      <team>DemoSolution Users</team>
    </memberOf>
  </team>
  <team name="DemoSolution Users" />
 </teams>
Export Teams
Click the Export toolbar button to export the Teams into an XML file.
Anonymous Users
To allow anonymous users access to the Gnosis Application, you must set configuration settings and Gnosis Views with Anonymous Team permissions.
Enable Anonymous Users
Set the AllowAnonymousLogin configuration setting to true. This allows the Gnosis Application to be accessible by anonymous users.
Although anonymous users are enabled, Views with Permissions set to Anonymous must still exist for the User to see anything.
Anonymous Start Page
You can set the Anonymous Start Page to a Gnosis gshtml type file stored in a Gnosis Files folder as a landing page in the Gnosis Configuration App.
Open the Gnosis Configuration App:
/#dashboard:configSet the AnonymousStartPage configuration setting to a Gnosis gshtml type file stored in a Gnosis Files folder. The file name requires a .gshtml extension, but the file path configuration does not need the .gshtml extension.
AnonymousStartPage = /pages/LandingGnosis gshtml type files stored in the Gnosis Files are similar to the gshtml type Gnosis Views. But there are a few special functions available to Gnosis Files gshtml files:
- Layout—the Layout(“{gshtml file path}“) function calls another gshtml file as the page to render that will expose the calling gshtml file results as the special Body variable. This allows the separation of the general page layout from page body content, which can be its gshtml files.
- Import—the Import(“{gshtml file path}“) function imports another gshtml file into the calling gshtml file. This allows for the separation of reusable code into many gshtml files.
- RenderAs—the RenderAs(“{gshtml file path}“) function calls another gshtml file passing a Dict object. The result of the gshtml file is injected into the calling gshtml file. This allows separate gshtml files to act as a template for formatting data.
The AllowAnonymousLogin must be set to true to use the AnonymousStartPage.
AllowAnonymousLogin = trueAlternatively, you can use a Solution Layout-type View named Start. For this to work, you must:
- Set AllowAnonymousLogin to true.
- Include the Anonymous Team as a Member of the “{SolutionName} Users” Team.
- Set the Default Solution to the Solution for the Anonymous Team.
Login Redirect
Set the LoginRedirect configuration setting to ???
LoginRedirect = ???Anonymous URL Show In Errors Log
When an anonymous user causes an error, the URL for the user is stored in the Error Logs.
Set the AnonymousShowInLogUrls configuration setting to a (:) delimited list of regular expressions ???
/Errors/AnonymousShowInLogUrls = ???